 |
| Recipe View | Buttons | |
|---|---|---|
 |
||
 |
Tap to add all the ingredients from this recipe to a selected shopping list. | |
 |
Tap to share or print this recipe. Available Options: text, rich text, pdf, image, html | |
 |
Tap to edit the details of this recipe. | |
 |
Type in the amount to scale your recipe. Use the arrow to enter the value when you are done typing or simply hit the return key on your keyboard. CookALot will multiply all quantities in your ingredients list by the given scale value and will use this value if and when you decide to add the ingredients to a shopping list. | |
| Scroll the view to see more information: ingredients, instructions, notes. | ||
| Edit Recipe View | Buttons | |
|---|---|---|
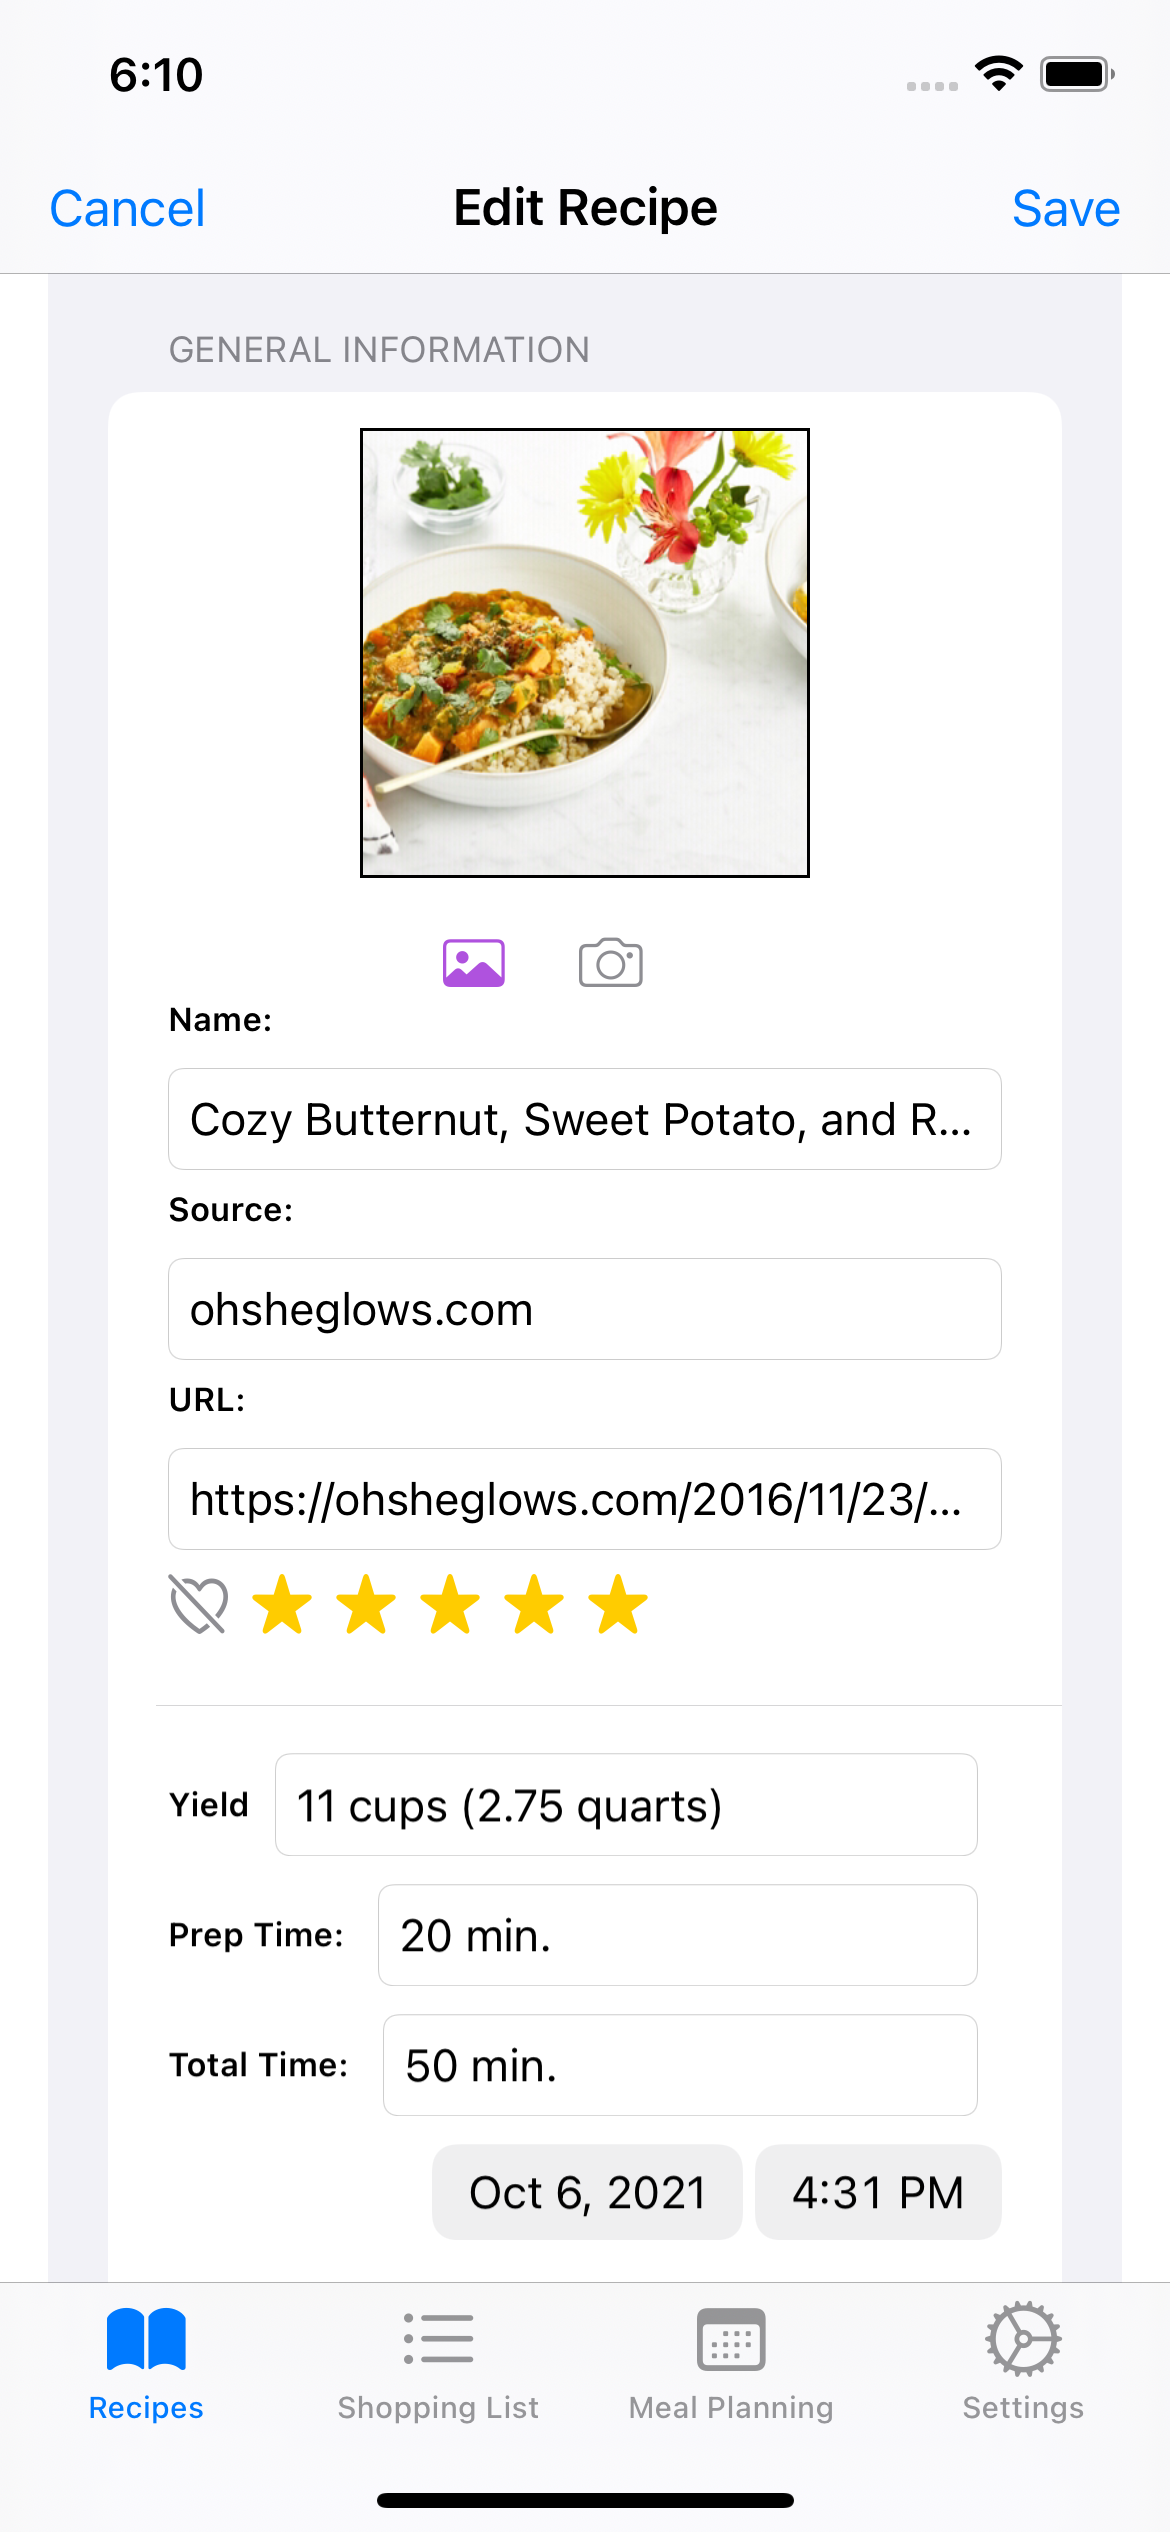 |
||
 |
Tap this button to import an image from your photos library. If you tap on this button when the button is purple, the system will ask you for permission to import photos from your library. If this button is red, you can enable this function by going to your system settings Privacy>Photos tap on CookALot and select Read and Write. |
|
 |
Tap this button to use your camera to take a photo. If you tap on this button when the button is purple, the system will ask you for permission to use your camera. If this button is red, you can enable this function by going to your system settings Privacy>Camera and toggle “CookALot” to the “on” position. |
|
| When entering text for the ingredients, instructions, or notes, you can add brackets around some text to label different sections. For example: [For the crust] or [For the topping]. You can add as many or as few of these section labels as you like. These sections labels will appear bold when you view the recipe. | ||
| Shopping List View | Buttons | |
|---|---|---|
 |
||

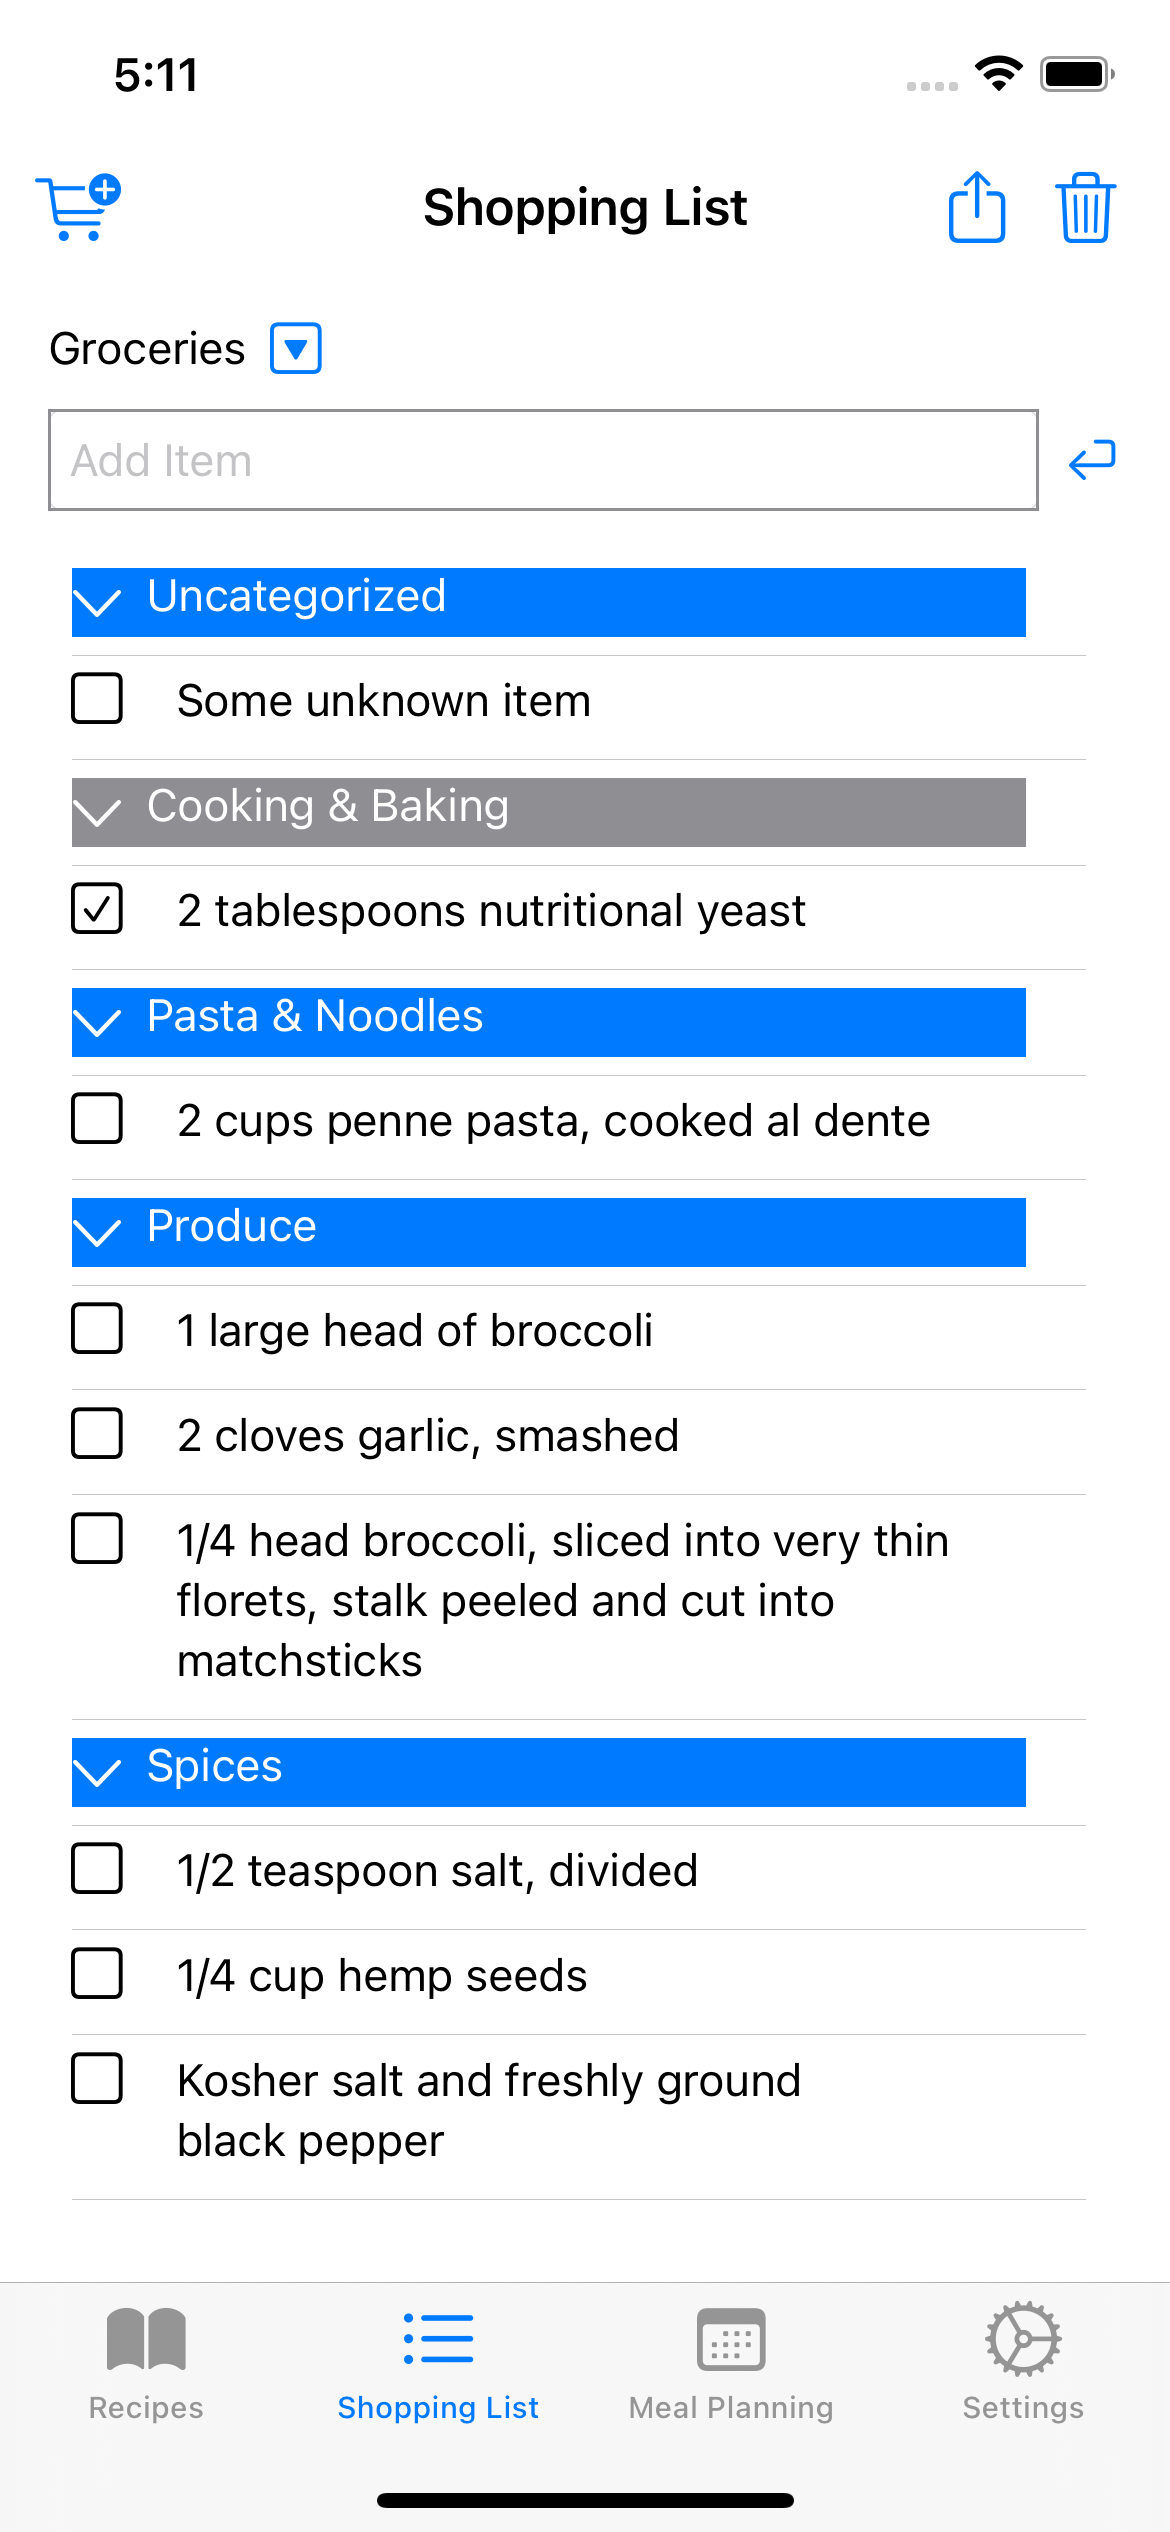
| Tap this button to toggle whether the item has been purchased or not. | |
 |
CookALot conveniently allows you to have multiple shopping lists. The label to the left of this button shows you the name of the current shopping list. Tap the down arrow to select a different shopping list. | |
 |
Tap this button to add the items from this list to one of your other lists | |
 |
Tap this button to share or print your shopping list. Available Options: text, rich text, pdf | |
 |
Delete all items from the current shopping list or delete only those items that have been purchased. | |
| Colored bars show the “category” for a set of items. A grey bar says that all the items in the category have been checked off (purchased). A blue bar says that one or more items have not been checked off. Tap the up arrow on a bar to collapse the category so the items are no longer visible. Tap the down arrow on a bar to expand the category and make the items visible | ||
  |
Tap these buttons hide/show all items in the given category. | |
Slide on an item name to see the Move/Edit/Delete buttons.  |
||
 |
||
| Type in the name of the item you want to add to your shopping list. CookALot will automatically add it to the appropriate category and combine similar items together as needed. If CookALot does not choose the category you prefer, you can always move the item into a new category and CookALot will remember where you put it. Use the arrow next to the text area to enter the item when you are done or simply hit the return key on your keyboard. | ||
| Menu Plan: Calendar View | Buttons | |
|---|---|---|
 |
||
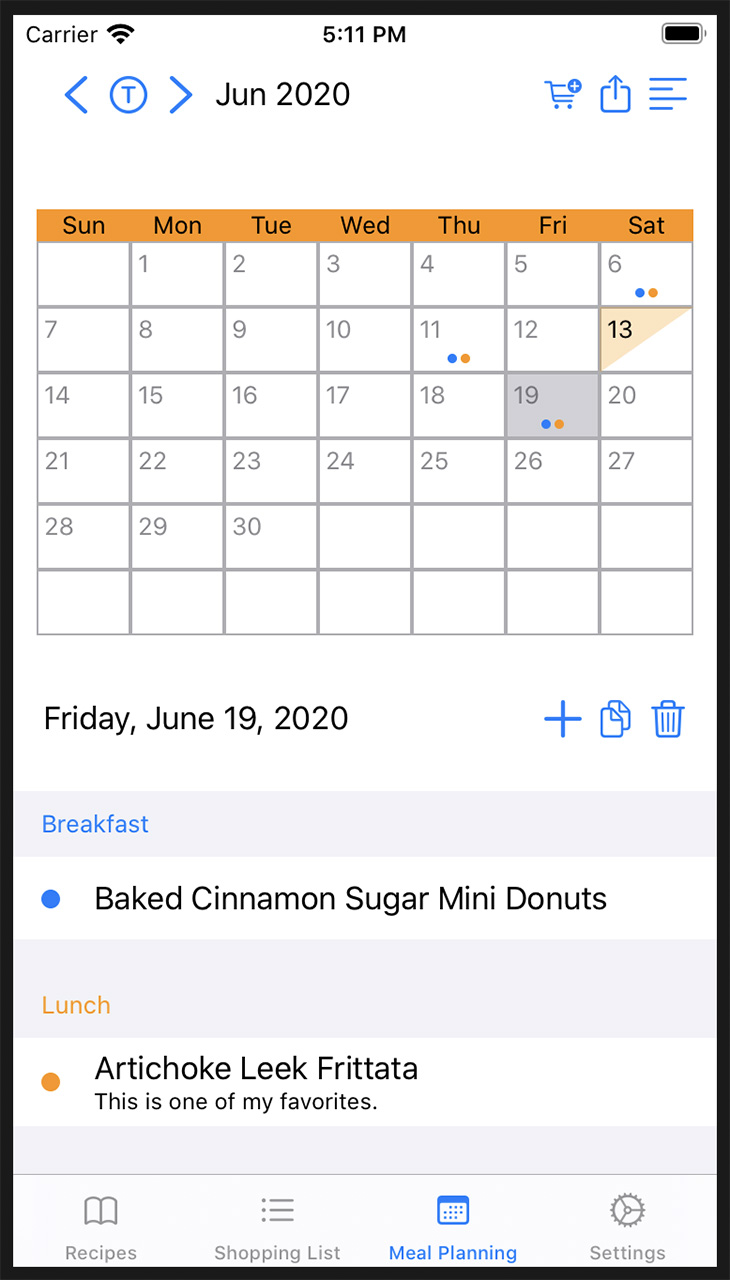
| Click on a square in the calendar view to see the menu plan for that day. The square that is half orange represents today’s date. The grey square represents the current menu plan. If there are no menu items for the current menu plan, the grey square will be empty, otherwise it will contain a dot for every meal that you’ve specified. | ||
 |
Use the left arrow to go back one month, the right arrow to go forward one month, and the “T” button to go to the month containing today’s date. | |
 |
Add the ingredients for the current menu plan to the selected shopping list. | |
 |
Share or print the current menu plan. Available Options: text, rich text, pdf | |
 |
Switch to the weekly view of menu plans. | |
 |
Add a new menu item to the current menu plan. | |
 |
Copy the current menu plan to another date. | |
 |
Delete the current menu plan. | |
| Tap on any menu item to edit that menu item or slide left to delete it. | ||
| Settings | |
|---|---|
 |
 |
Shopping Lists: tap to bring up a panel that lets you add, delete or re-order your shopping lists. The text entry area lets you type in the name of a new shopping list. The edit button lets you slide left to delete a shopping list, press and drag to move names to a different position. Click on a shopping list name lets you rename the shopping list.
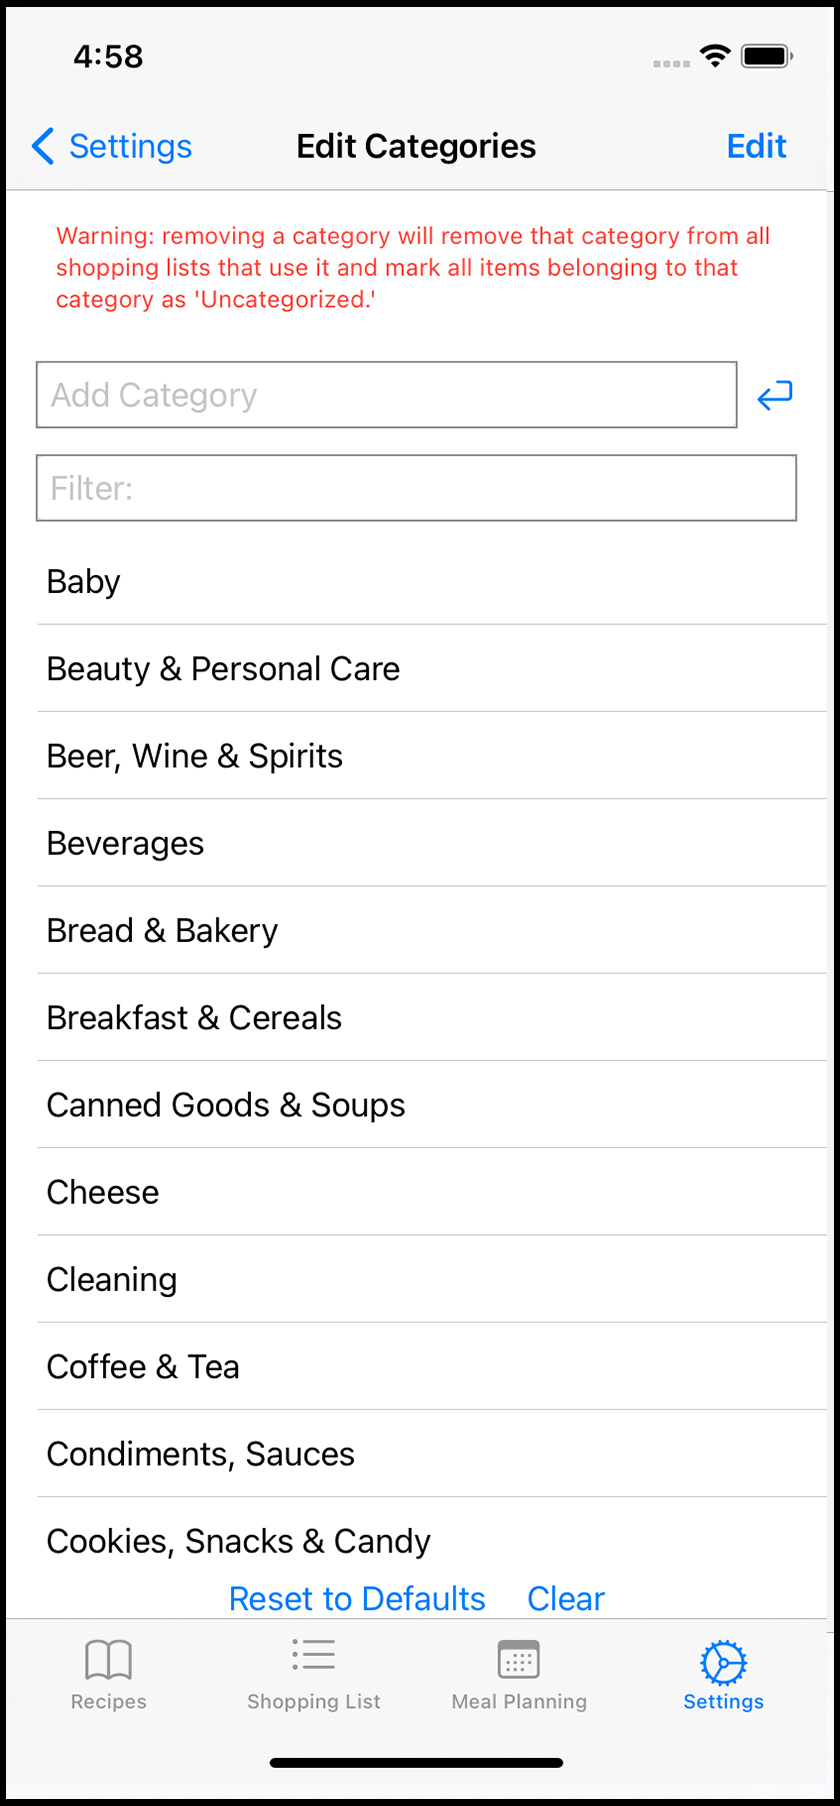
Categories: tap to bring up a panel that lets you add, delete or re-order your the categories used in your shopping lists. The text entry area lets you type in the name of a new category. The edit button lets you slide left to delete a category, press and drag to move names to a different position. Clicking on a category name lets you rename the category.
Tags: tap to bring up a panel that lets you add, or delete the tags used in your recipes. These tags get entered when you edit or import a recipe. You can add or remove tags at any time. The text entry area lets you type in a list of comma separated tags. The edit button lets you slide left to delete a tag. There is no order for the tags so you cannot drag to re-order them. Clicking on a tag, lets you rename the tag. You can enter multiple (comma separated) tags for a single tag. For example you might want to change “appetizers & snacks” into two separate tags, one for appetizers and one for snacks; to do this you would simple type in “appetizers, snacks” in the editing area.
Keep screen on: toggle this on when you want the display to stay on, to not dim or ask for a passcode, while you are using the app. This is convenient when you want to view a recipe while you are cooking or when you are viewing a shopping list while shopping. If this option is on, be sure to close the app when you are not using it to preserve your battery.
Keep menu plans: lets you decide how long you want to keep your menu plans. If you select 3 months, 6 months or 1 year, menu plans will be deleted when they are older than the desired amount of time. Once you delete menu plans they are gone; you cannot get them back.
iCloud: tells you if the program is currently using iCloud to save your recipes, shopping lists and menu plans. It does not let you set this value here because these are system settings not program settings.
If you scroll down to the bottom of the Settings panel you will see the following option:
- Export Recipes to folder This will bring up a panel and let you select a folder in your iCloud Drive where it will save all your recipes in a web format called HTML. This is one way you can backup all your recipes or import them into another program.
- Import Recipes from folder: This will bring up a panel and let you select a folder from your iCloud Drive where it will load all recipes with the .html file extension. You can use this to restore the files you previously saved or exported to your iCloud Drive.
- Why can’t I import a recipe from a given web address?
- Sometimes the web page does not export its recipe data. To import this data you will have to do it manually by creating a new recipe and copying and pasting the data from the webpage.
- I imported my recipe from a webpage but the image does not appear?
- Sometime a webpage does not export its image data. To import this data you will have to copy/paste the image from the webpage into the recipe. To do this, right click on the image in your browser, select “Copy Image”, edit the CookALot recipe, press and hold over the image icon, then select “Paste Image” and save your recipe.
- How do I add an image to my recipe?
- You can add an image three different ways:
- You can select a photo from your photo library by clicking on the photo icon on the “Edit Recipe” page.
- You can take a photo with your camera using the camera icon on the “Edit Recipe” page.
- You can copy and paste an image from a webpage by right clicking on the image in your browser, select “Copy Image”, edit the CookALot recipe, press and hold over the image icon then select “Paste Image” from the popup menu.
- What is the Purge History under the iCloud settings do? In order to sync data between your devices, iCloud keeps a record of all the things you import, edit, or delete so when you sync to another device it will know how to update its data. Once you know that all your devices have been updated and that you have all the data you need, you can Purge History to delete the extra data being stored in the cloud. DO NOT use this command when you have not sync’d all your devices.
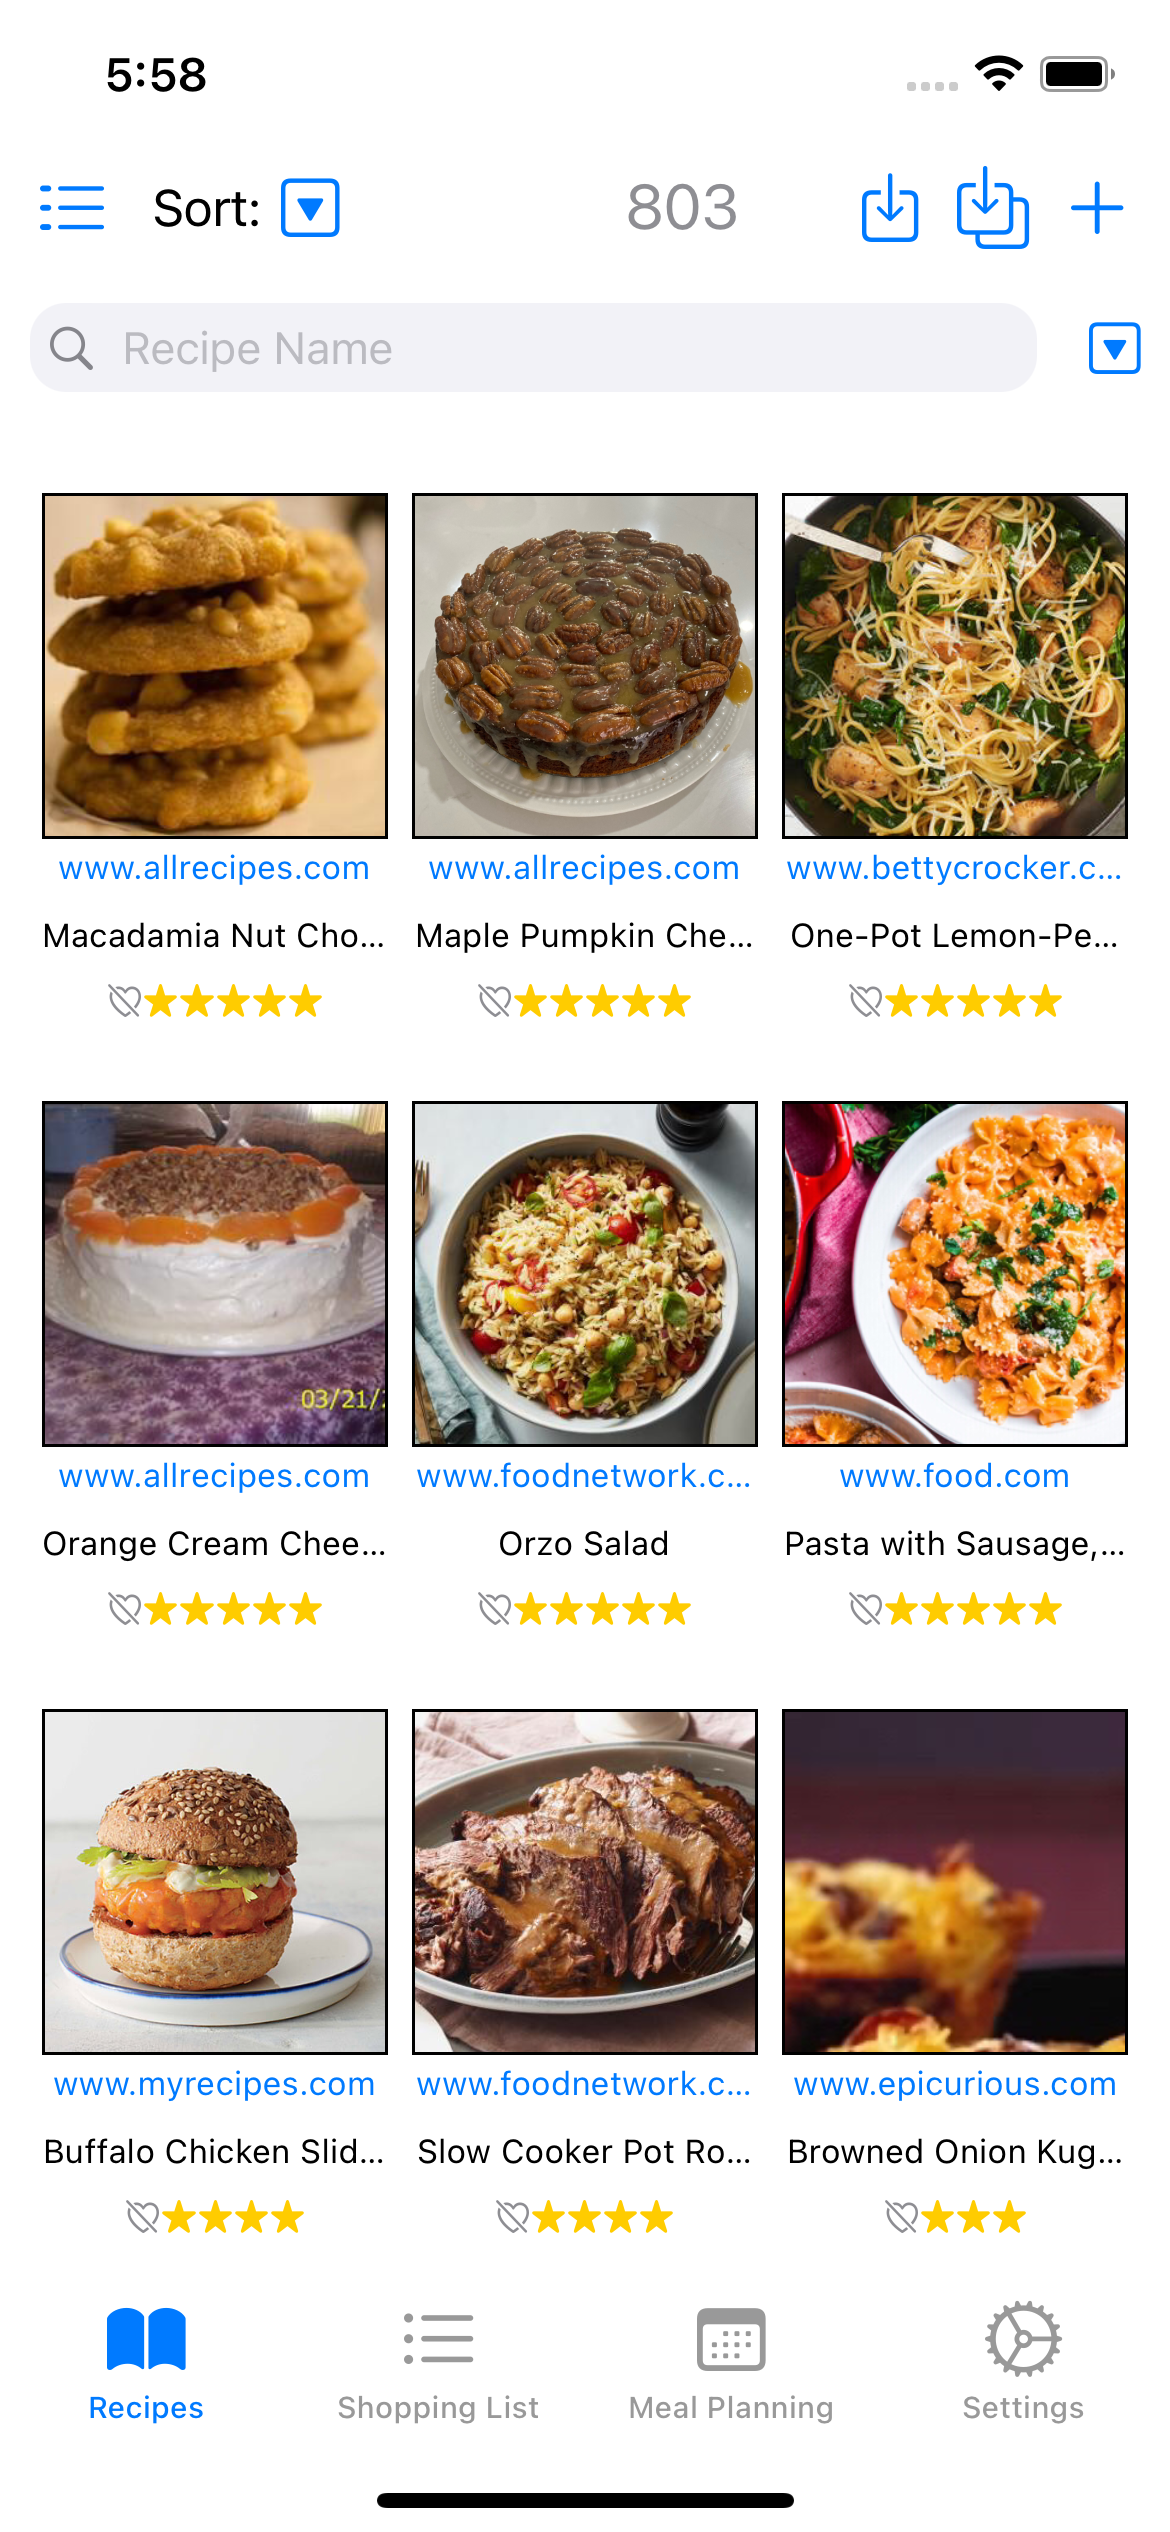 Recipe List View
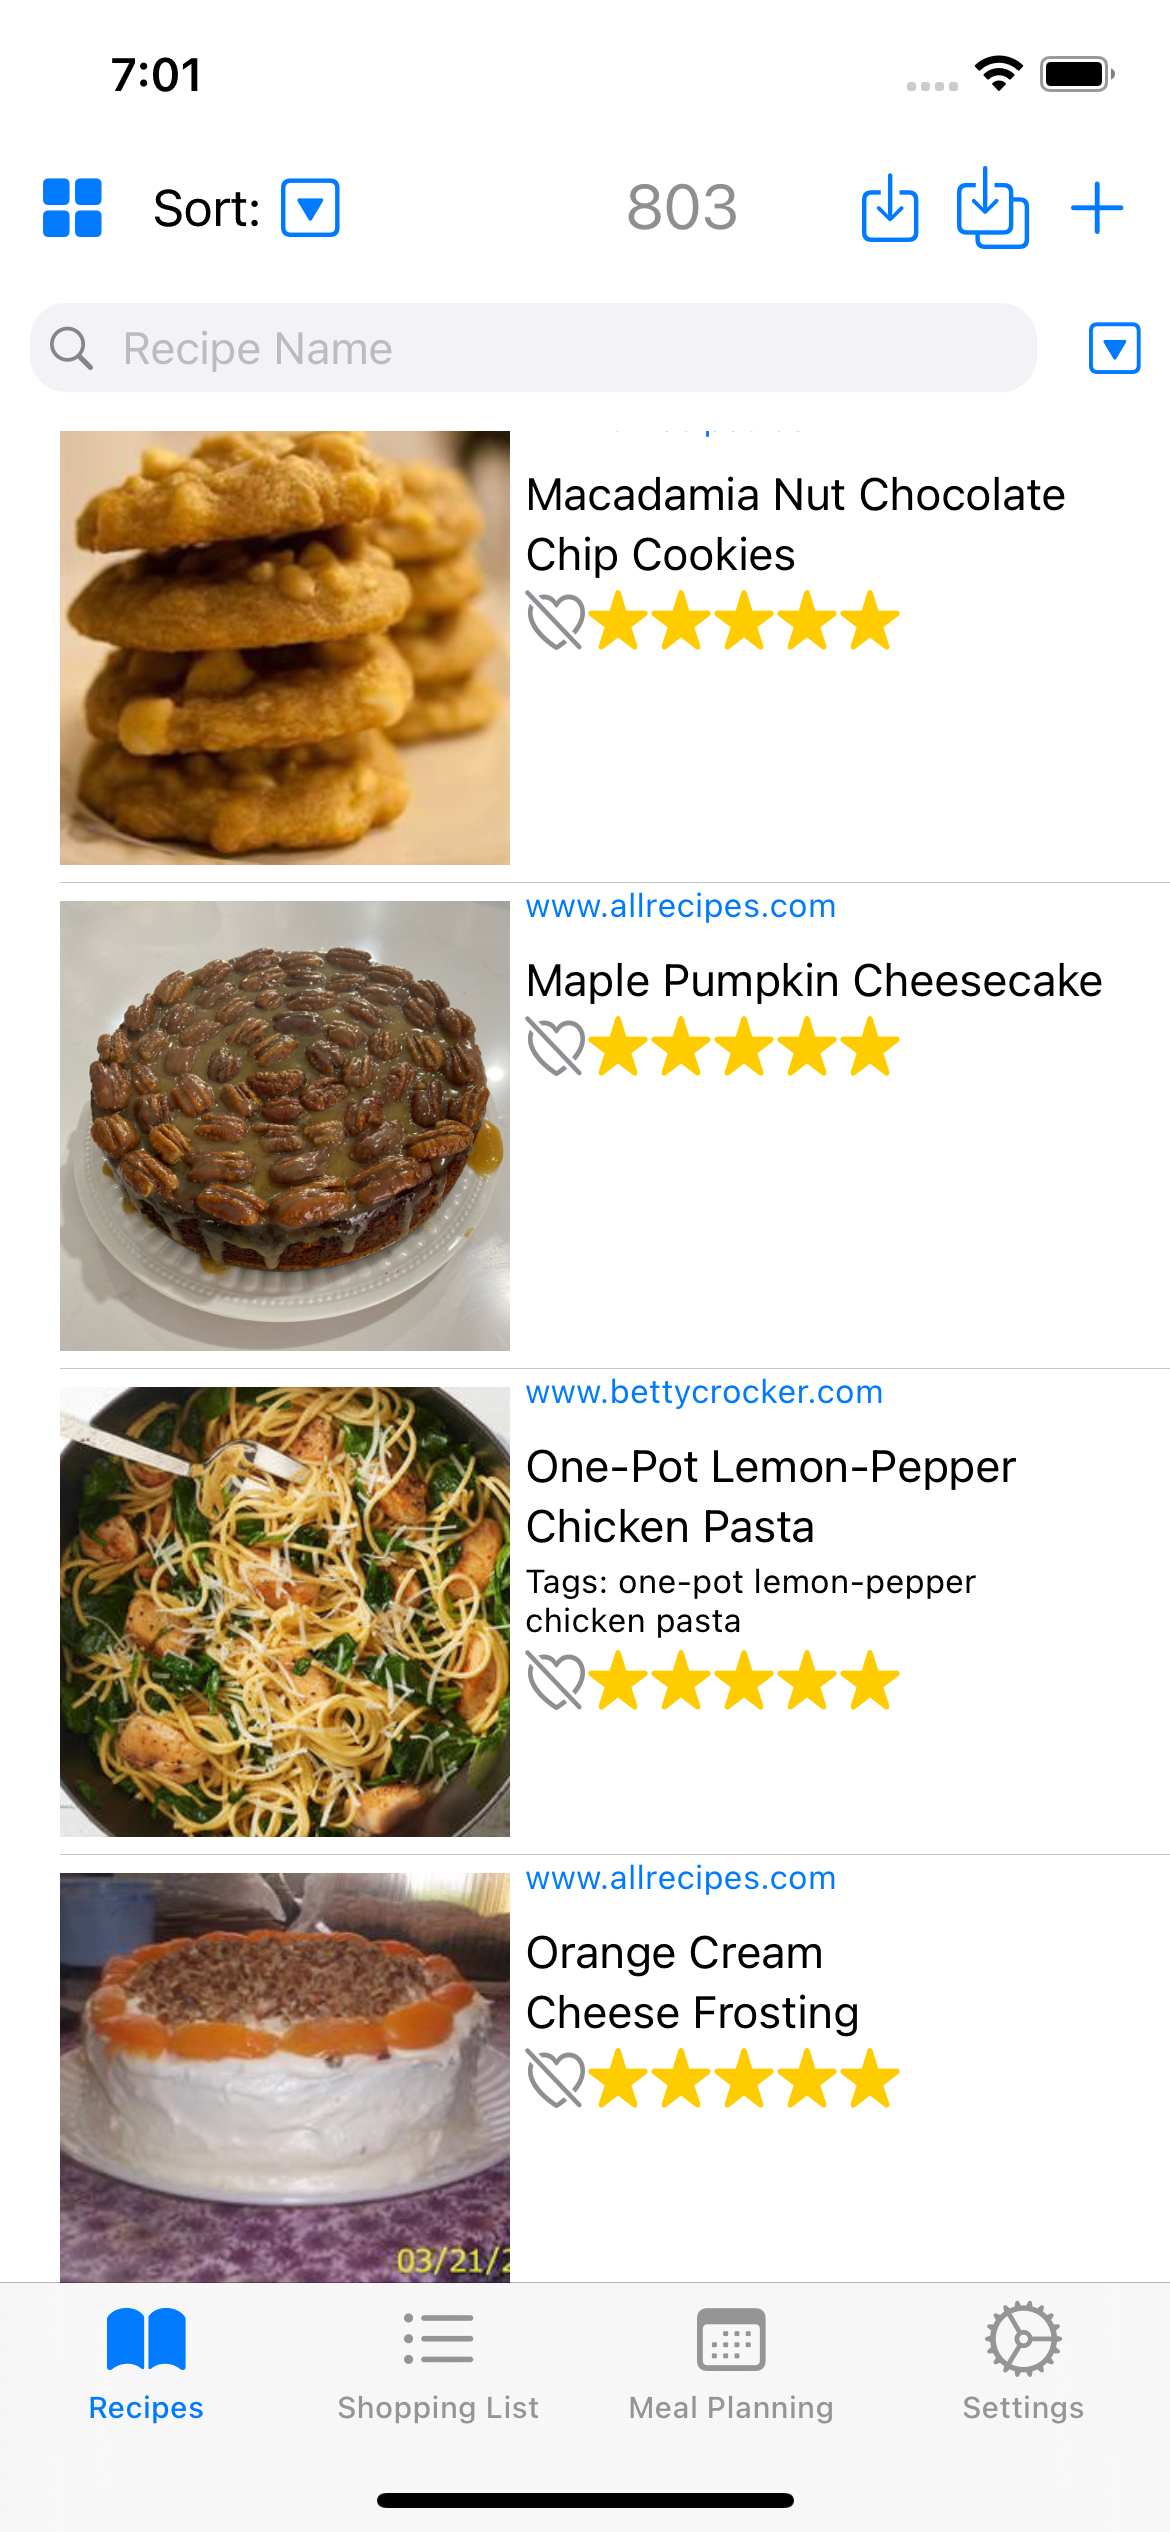


 Allows you to search your recipes. Tap the down arrow to select your search criteria. You can search by recipe name, by source, by tags, by rating, or by favorite.